
Python and VS Code Setup
We use uv to manage Python and Python packages in this course. uv is a single fast tool that replaces python, pip, and virtualenv — it installs the Python interpreter for you, creates the virtual environment, and locks the package versions so that everyone in class runs exactly the same code.
Install uv
macOS / Linux — open Terminal and run:
curl -LsSf https://astral.sh/uv/install.sh | shWindows — open PowerShell and run:
powershell -ExecutionPolicy ByPass -c "irm https://astral.sh/uv/install.ps1 | iex"Close and reopen your terminal, then verify the installation:
uv --versionYou should see something like uv 0.9.x. If the command is not found, the terminal has not picked up the new PATH yet — close every terminal window and open a fresh one.
If you already have uv installed, upgrade it:
uv self updateInstall Python 3.14
We use Python 3.14 in this course. You do not need to download Python from python.org — uv manages Python interpreters for you, and the version it installs is completely separate from whatever Python already came with your computer.
Install it, and make it your default Python at the same time:
uv python install --default 3.14You will see output like this:
warning: The `--default` option is experimental and may change without warning. Pass `--preview-features python-install-default` to disable this warning
Installed Python 3.14.7 in 7.79s
 + cpython-3.14.7-macos-aarch64-none (python, python3, python3.14)
The warning is expected — ignore it. --default is still marked experimental in uv, but it works fine and is what we want.
The last line is the important one: (python, python3, python3.14) means uv put all three of those commands on your PATH, pointing at 3.14. That is what makes 3.14 the Python on your computer.
Close and reopen your terminal, then check:
python --versionYou should see Python 3.14.x. (If you left off --default, just run the command again with it — nothing is downloaded twice.)
Also make 3.14 the default for every uv project you create:
uv python pin --global 3.14This writes a global .python-version in your uv config folder, so any project that does not pin its own version uses 3.14 instead of whatever else happens to be installed.
See every Python version uv knows about, and which ones you already have:
uv python listThe versions marked with a path (e.g. cpython-3.14.x-macos-aarch64 followed by a path under ~/.local/share/uv/python/) are installed and ready to use. You can try it out right away:
uv run --python 3.14 python -c "import sys; print(sys.version)"You should see 3.14.x.
Create the Course Project
You should get comfortable with command line commands. We are going to create one folder that holds all your work for this course — I use ml4biz — and turn it into a uv project. Follow the section for your operating system.
We put the folder directly in your home folder.
A note on ~
Your home folder is the one named after your user account: /Users/<your-name> on a Mac, C:\Users\<your-name> on Windows. It holds Documents, Desktop, Downloads, and so on.
Because you refer to it constantly, the command line gives it a one-character nickname: the tilde ~ (on most keyboards, Shift + the key to the left of 1). Anywhere you could type the full path to your home folder, you can type ~ instead. These two commands are identical:
cd /Users/harrywang/ml4biz
cd ~/ml4biz
Two ~ commands worth memorizing now — they work on both macOS and Windows PowerShell:
cd ~— go straight back to your home folder from anywhere. Use this when you are lost.cd ~/ml4biz— jump straight to your course folder from anywhere. This is how you will start most class sessions.
You will see ~ in paths throughout this page and in the rest of the course; every time, it just means "my home folder."
Creating the Folder
macOS
Open Terminal (press Command + Space, type Terminal, hit Return). Terminal already starts in your home folder, so you can create the project right away:
mkdir ml4biz
cd ml4biz
uv init --python 3.14
The project ends up at /Users/<your-name>/ml4biz. To see it in Finder, choose Go → Home from the menu bar (or press Command + Shift + H).
Windows
Open PowerShell (press the Windows key, type PowerShell, hit Enter — the blue one, not "PowerShell ISE"). PowerShell also starts in your home folder:
mkdir ml4biz
cd ml4biz
uv init --python 3.14
The project ends up at C:\Users\<your-name>\ml4biz. To see it in File Explorer, type %USERPROFILE% in the address bar and press Enter.
Both
These commands do the same three things on either system: mkdir makes a new folder, cd moves you into it, and uv init sets up the project. After the last command you should see a message that uv initialized the project. Confirm you are in the right place and see the new files:
pwd
ls
On Windows PowerShell pwd and ls work the same way. You should see main.py, pyproject.toml, and README.md listed.
uv init creates a few files for you:
pyproject.toml— the list of packages your project needs.python-version— pins the project to Python 3.14main.py— a sample program you can deleteREADME.md— a description of your project, written in Markdown.gitignore— used later when we put the project on GitHub
The first two are the ones that matter. Note that .python-version and .gitignore start with a dot, which makes them hidden files — plain ls will not show them. Use ls -a (macOS) or ls -Force (Windows PowerShell) to see them. VS Code shows them in the file explorer either way.
The .python-version file is what makes this reproducible: every uv run and uv sync in this folder uses Python 3.14, no matter which Python is first on your PATH. If you ever need to change or re-pin the version, run:
uv python pin 3.14If you forgot the --python flag when you ran uv init, uv python pin 3.14 fixes it after the fact — then delete the .venv folder and run uv sync so the environment is rebuilt on 3.14.
Install the Packages
Add every package we use this semester in one command — copy the whole thing, it is one line:
uv add ipykernel ijson numpy pandas matplotlib seaborn streamlit scipy scikit-learn joblib statsmodels xgboost plotlyuv add does everything at once: it creates a virtual environment in a hidden .venv folder inside ml4biz, installs the packages, records them in pyproject.toml, and writes the exact versions to uv.lock. It takes a minute or two the first time.
Here is what each one is for, listed in the order we first use them during the semester:
| Package | What it is | Where we use it |
|---|---|---|
| ipykernel | runs Jupyter notebooks inside VS Code | every notebook |
| ijson | streaming JSON parser | Python Basics |
| numpy | arrays and numerical computing | Numpy Basics, then everywhere |
| pandas | data frames for tabular data | Pandas Basics, then everywhere |
| matplotlib | the core plotting library | Matplotlib Basics, then everywhere |
| seaborn | statistical plots, nicer defaults | Matplotlib Basics, SVM, Ensembles, Clustering |
| streamlit | turns a script into a web data app | Data App tutorial and lab |
| scipy | statistics and sparse matrices | Data Cleaning, Decision Trees |
| scikit-learn | the machine learning library | Decision Trees onward |
| joblib | saves trained models to disk | Full Pipeline |
| statsmodels | regression summary tables | Linear Regression |
| xgboost | fast boosted trees | Ensemble Learning |
| plotly | interactive and 3D charts | Clustering, Feature Importance |
Installing them all now means you will not be interrupted mid-semester. If you ever need something else later, the command is the same — for example uv add nltk.
NOTE: it's critical to have the following versions of the packages so that the sample code would work. Check what got installed:
uv pip listMake sure your versions are the same or greater than the following:
matplotlib      3.10.0
numpy           2.0.1
pandas          2.3.1
scikit-learn    1.7.1
scipy           1.14.0
seaborn         0.13.2
statsmodels     0.14.2
streamlit       1.37.0
xgboost         2.1.0
If a version is too old, upgrade it:
uv add --upgrade pandasRunning Code
You never have to "activate" anything with uv. Prefix any command with uv run and uv will use the project's environment automatically:
uv run python main.py
uv run python -c "import sklearn; print(sklearn.__version__)"
uv run also re-syncs the environment first, so if you pull a new pyproject.toml from me the missing packages get installed for you.
Sharing and Restoring a Project
Because pyproject.toml and uv.lock record the exact versions, anybody can reproduce your environment with one command:
uv syncVS Code
We use VS Code as the IDE (Integrated Development Environment) for this course. Follow the instructions at https://code.visualstudio.com/docs/setup/setup-overview to download and install VS Code.
You also need two VS Code extensions, Python and Jupyter. Install them from the Extensions panel in the left sidebar, or let VS Code offer them: open a notebook, click Select Kernel in the top-right corner, and choose Install/Enable suggested extensions Python + Jupyter:
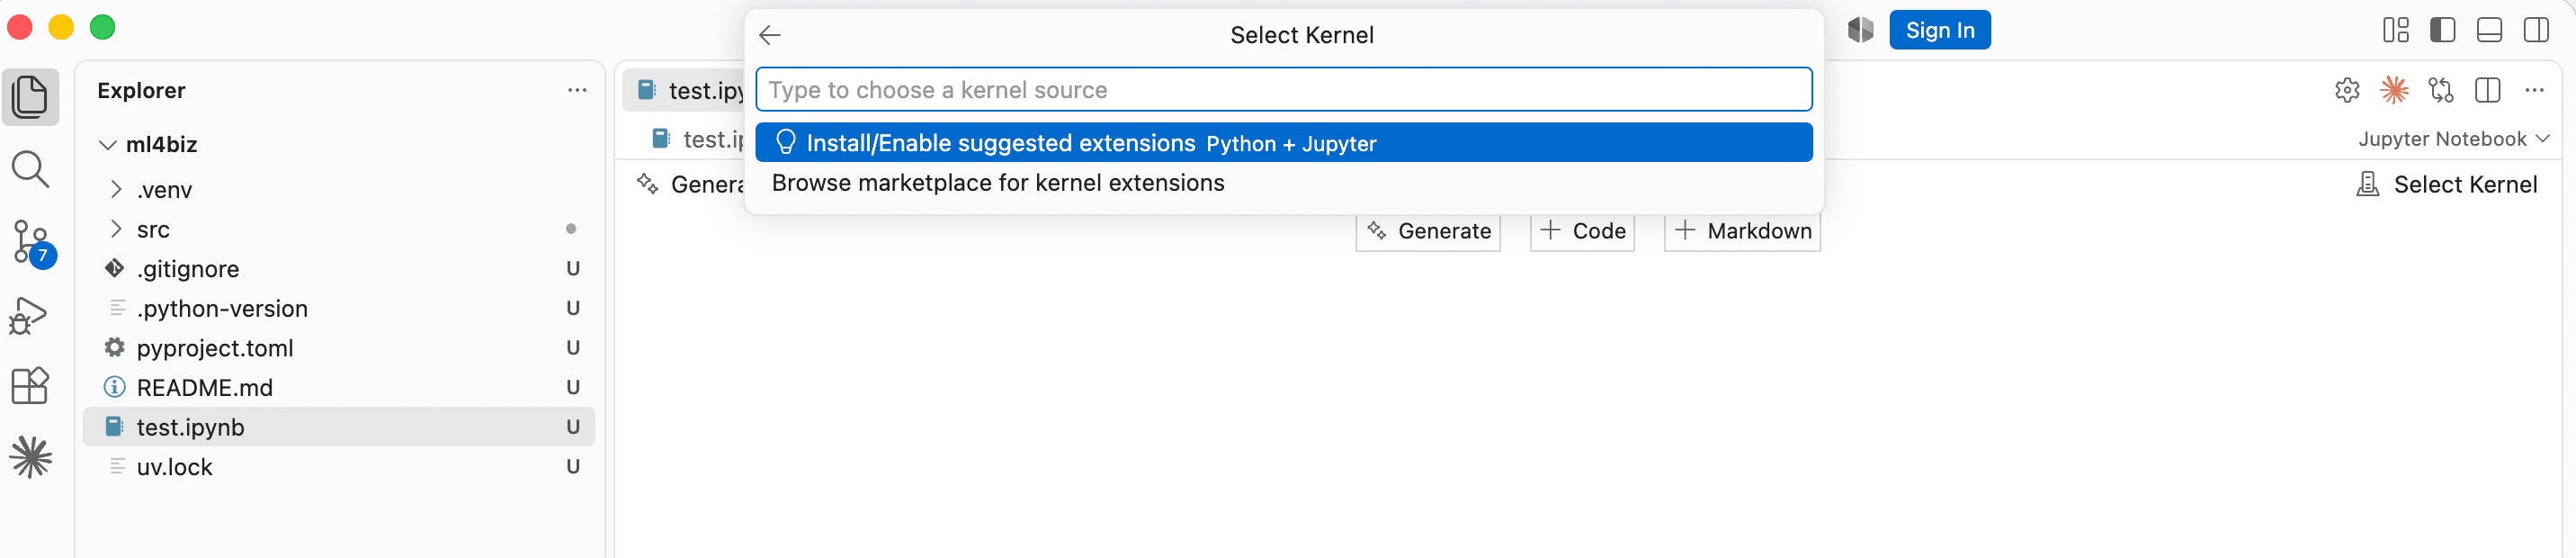
Do not skip this. Without these two extensions VS Code cannot run notebooks — the kernel picker in step 4 will offer nothing but this install prompt, and none of your Python environments will be listed.
Next, we need to set up VS Code:
-
We use the
ml4bizfolder you created above — you do not create a new one here. Make sure you can find it: on macOS choose Go → Home in Finder (Command + Shift + H); on Windows type%USERPROFILE%in the File Explorer address bar. This is the same folder as~/ml4biz: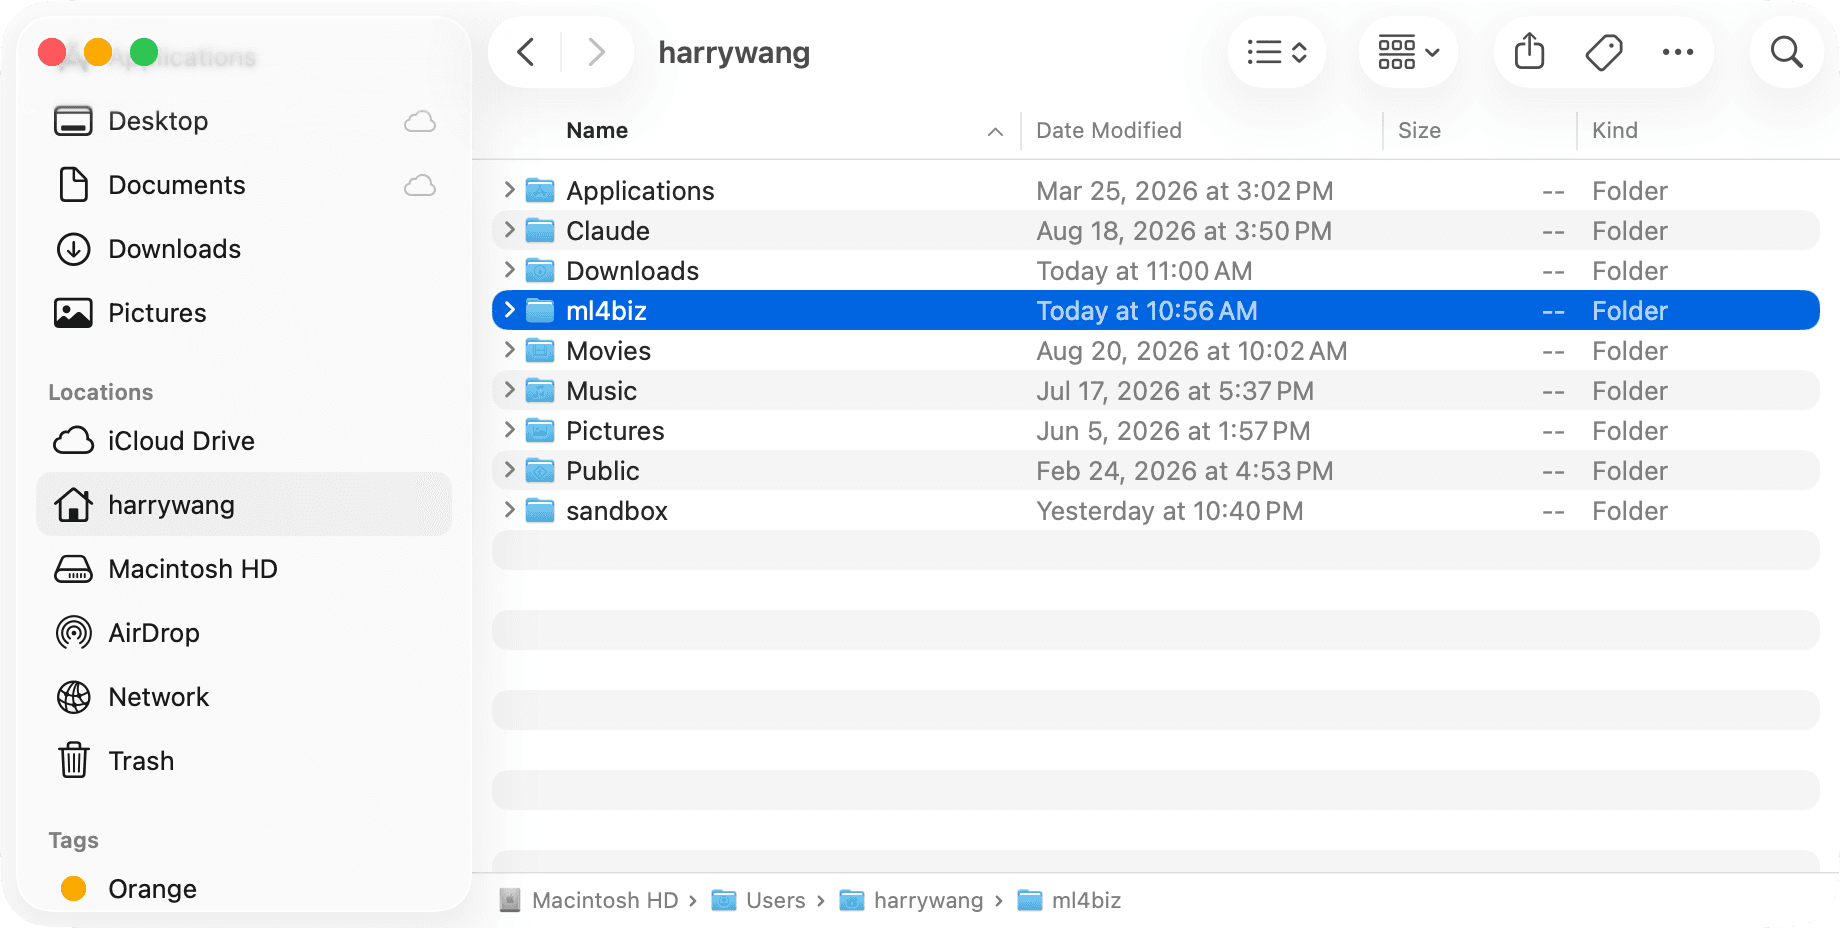
-
Open VS Code, then choose File → Open Folder… and select
ml4biz: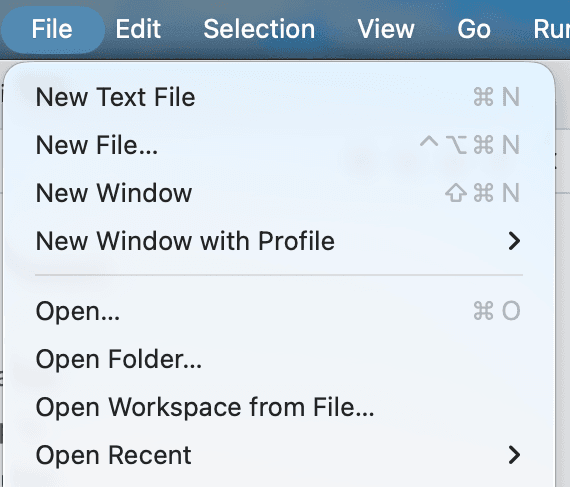
-
Create a new Jupyter Notebook. Choose File → New File…, then pick Jupyter Notebook from the list. Save it as
test.ipynbin yourml4bizfolder: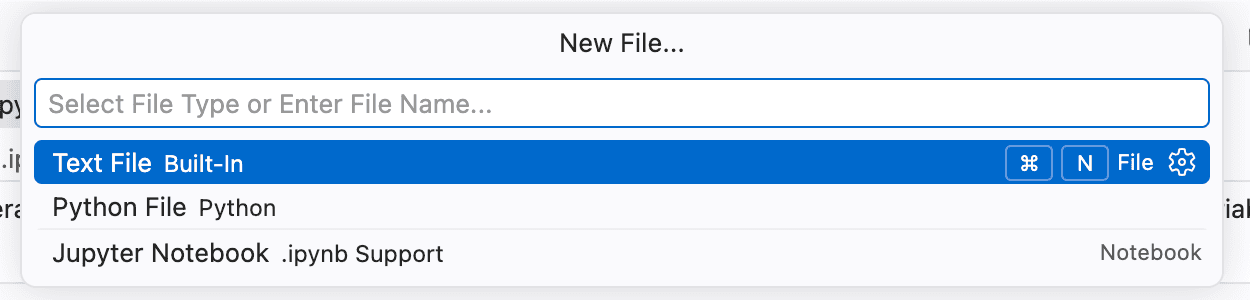
-
Make sure the notebook uses the project's
.venvenvironment — the oneuv addcreated. Click the kernel name in the top-right corner to switch: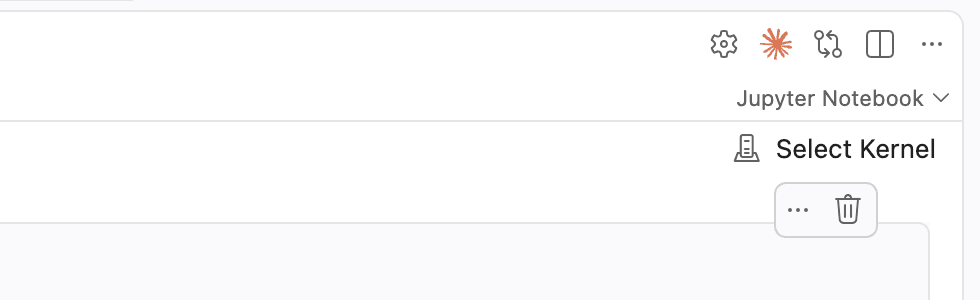
Choose Python Environments…:
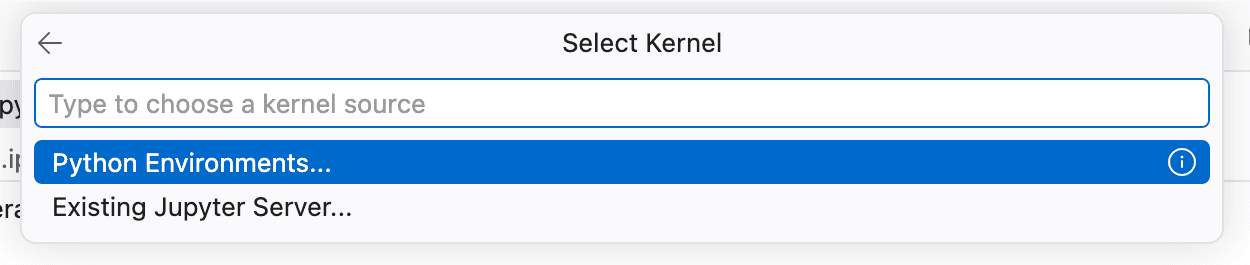
Then pick the one marked Recommended — it is named after your project and points at
.venv/bin/python: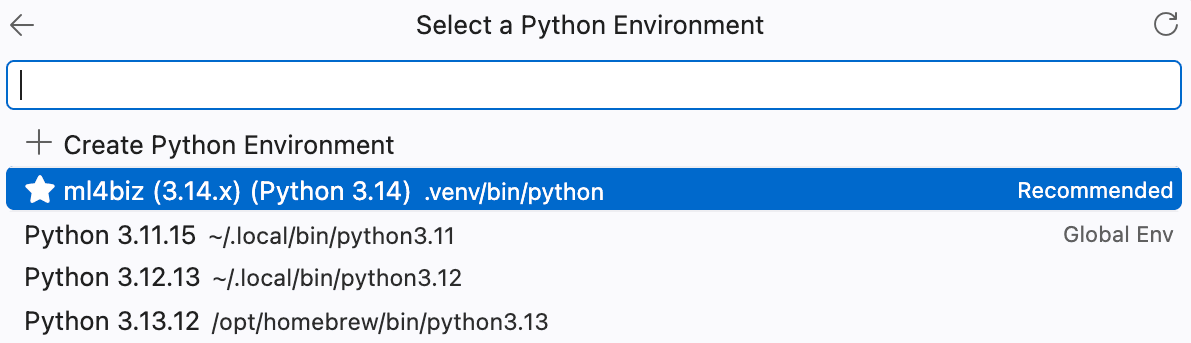
On macOS the path ends in
.venv/bin/python; on Windows it ends in.venv\Scripts\python.exe. If you do not see it, close and reopen VS Code. -
Create a code cell, type
print('hello world'), and run the cell to confirm the setup is correct:
Next, create a Markdown cell and type the following:

which is formatted as follows once you run the cell:

Save the notebook file.
-
Create and run a Python program. In the same folder, create
test1.pycontaining one line,print('this is from a python program'):
Tell VS Code which interpreter to use for
.pyfiles. Click the Python version in the status bar at the bottom right of the window:
That opens the interpreter list:
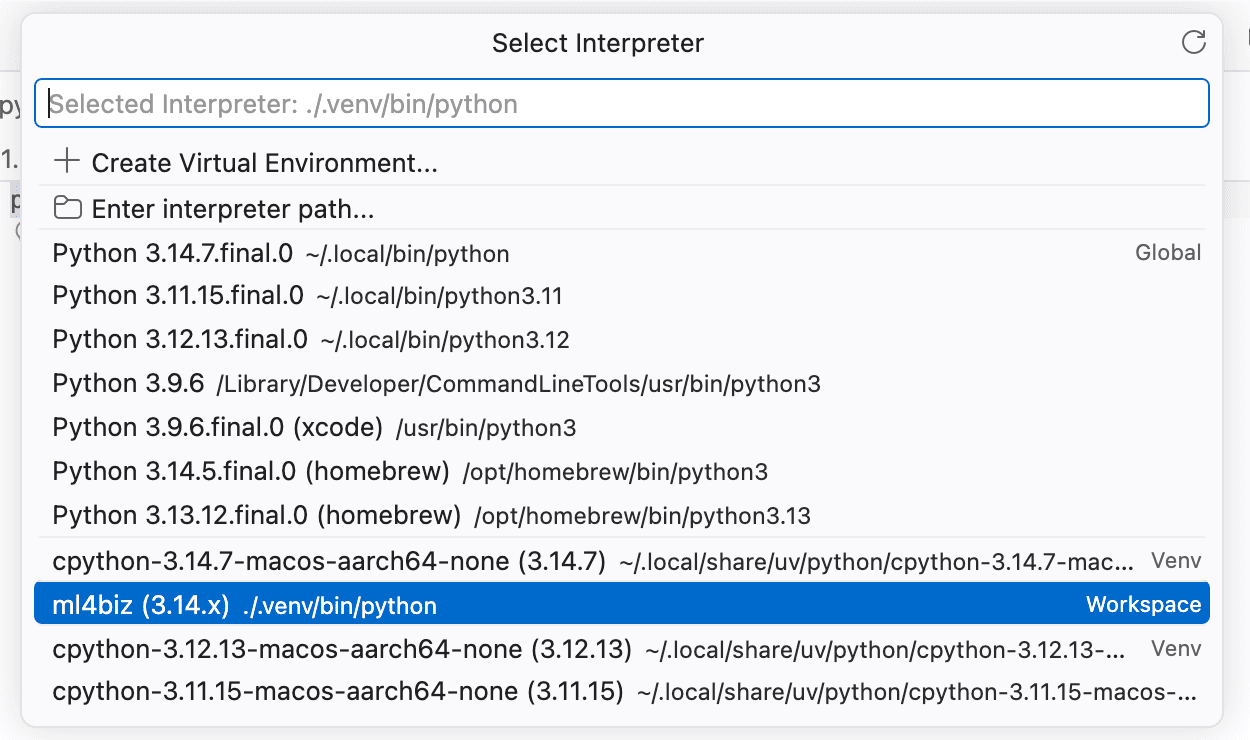
and pick the same
.venvinterpreter inside yourml4bizfolder that you chose in step 4.Save the file, then right click
test1.pyin the Explorer and choose Run Python File in Terminal: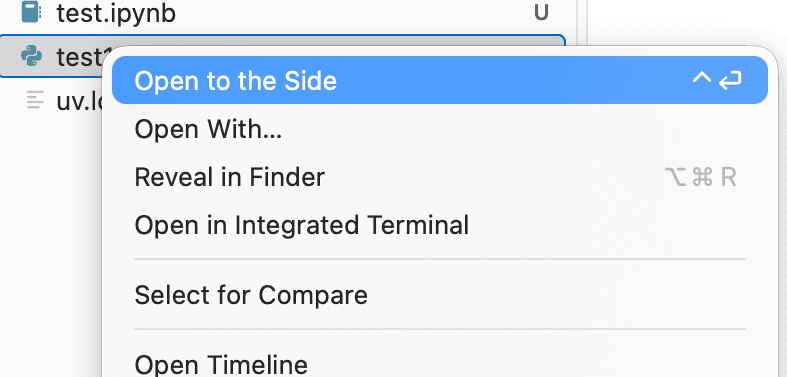
The result of the program is shown in the terminal.
You can also open a terminal inside VS Code (Terminal → New Terminal):

It opens already in your
ml4bizfolder, so you can run the program directly:uv run python test1.pyFinally, notebooks can be exported as a Python script (
.py), HTML, or PDF. Opentest.ipynb, click the ⋯ button in the notebook toolbar, and choose Export: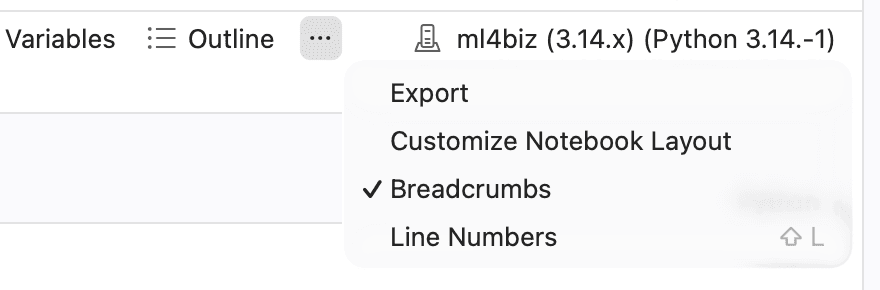
then pick the format you want:

Cheat Sheet
| Task | Command |
|---|---|
| Check uv version | uv --version |
| Install Python + make it default | uv python install --default 3.14 |
| Make 3.14 the default for new projects | uv python pin --global 3.14 |
| List Python versions | uv python list |
| Pin the project's Python | uv python pin 3.14 |
| Start a project | uv init --python 3.14 |
| Add a package | uv add pandas |
| Remove a package | uv remove pandas |
| Upgrade a package | uv add --upgrade pandas |
| List installed packages | uv pip list |
| Recreate the environment | uv sync |
| Run a program | uv run python test1.py |
| Start Jupyter Lab | uv run --with jupyter jupyter lab |